Showing posts with label swatches. Show all posts

Tuesday, 26 March 2013

In Vogue Feather Effect Swatches

I have been so excited to get my hands on these, first posted about here, so when they arrived I had to immediately try them all out at once, after quickly taking a bottle shot. 

The colours are (from left to right) Parakeet, Sunset, On the money and Jaye Bird; you can see some comparison bottle shots  beside their Nails Inc cousins here.


Up close shot of some sample swatches I did before I got home and tried them out on my nails, I think this picture shows the colours of the bar glitter really well.


Now some pictures of them on the nail, I love how these polishes look!


From top to bottom; Parakeet, Jaye Bird, On the money and Sunset. 
All the feather effects are two coats over a base colour of Barry M Blue Moon.


I was so pleased with the way the feather effect polishes applied, the glitter is thick and dense in the clear base which means that the polish is almost totally opaque in just two coats and really covers the base shade I used.  The polish applies beautifully, it's really easy to move it about on the nail to get an even coverage, much less faff than a lot of glitter top coats I own!

Now for some close ups to properly show the beautiful colours of the bar glitter in these polishes.  First up Parakeet.


Jaye Bird.


On the Money.


And finally, Sunset.


As you can see (in the last close up shot) there are odd pieces of glitter which do very slightly overhang the nail edge leaving a bit of a rough effect, I didn't find it a huge issue and it's definitely something you could avoid with careful application.  For the odd pieces of glitter which did end up overhanging my nail edge I found it easy enough to remove with a quick file.

The polish dries to a slightly rough texture which might not suit everyone but it's easily enough covered with an extra coat of top coat of you prefer a smooth finish.


The polish also dried surprisingly fast which was a pleasant surprise, often layering glitters can take forever to dry but these ones were touch dry within a few minutes.

Overall I am delighted with these polishes; I love how they look, I love how they apply and most of all I love that they are a fraction of the cost of the Nails Inc collection that they emulate.  A total win for In Vogue, I'll definitely be making sure to keep an eye on the polishes they release in the future, if this initial collection is anything to go by then they could very well be the next high street brand to look out for.

Wednesday, 3 October 2012

Swatchicles

What are Swatchicles I hear you cry?  Well, this post should explain! 
 
As your nail polish collection grows it can be difficult (if you're like me!) to remember exactly what you have hidden away in drawers so for this reason I like to swatch all my polishes on my Nail Claws, also commonly known in the nail world as Swatchicles.
 
 
Swatchicles are colour swatches of each polish which are stuck onto lollipop (popsicle) sticks to help you keep track of your collection, colour match your polish and compare similar shades.  The nail comes from the combination of the words Swatch and Popsicle, because these are swatches of colour attached to popsicle (or lollipop if you are based in the UK like me) sticks.
 
For me they are the easiest and most practical way to keep track of exactly what I have in my stash.  Nail wheels are fine if you aren't planning on adding to your collection but as soon as you do you either have to start the whole wheel again to add the new shade into the right place or you have to live with your colours being out of order (something my slightly OCD attitude will not allow).
 
These swatch sticks are also very simple to make, and generally a lot cheaper than buying nail wheels or stands with ready made swatch sticks included.  Here's my speedy guide on how to make your own should you wish to:
 
 
All you need are lolly sticks, false nail tips and double sided sticky pads.  I buy my lolly pop sticks and nails from eBay or Amazon depending on who is cheapest but a craft shop, for the sticks, or beauty supply store, for the nails, would also work.
 
I buy the nails I use in a size 2, these are a good fit to the sticks and give a nice large area of colour once they're painted.  Some people use larger nails but I find this size is big enough and I like the fact they end up being in line with the lolly stick.
 
 
To create your Swatchicle simple double over a sticky pad, attach it to the top of your stick and then place your false tip over the top, give it a little squeeze and you're ready to paint.
 
 
On your stick you can then write any information you like to have handy about the swatch, generally I do Brand, Polish Name, Polish Number and number of coats I've done on each swatch.  This means when I choose a colour I know exactly which bottle type and drawer to look for to locate that polish.  Once they're all painted and labelled they're ready for matching and comparisons.
 
 
As you can see, I have quite a collection forming which I keep in Tupperware pots for easy access, they look nice and colourful sat on my mantelpiece, like little pots of nail shaped flowers. :)
 
 
Having all the colours I own easily accessible and beside each other means that I don't tend to over look colours just because they are older or hidden at the back of a drawer, it also means I can store my polishes by brand rather than colour family which makes it really simple to find the bottle I want as fast as possible.  It also means I can easily compare similar colours to see which best suits my needs (and outfit) that day.
 
 
I tend to save up my new buys and paint the sticks in bulk, that way I can get a little production line going and by the time I get back to the first stick it's ready for it's second coat.
 
 
So, there you have it, an introduction to Swatchicles!  Do you swatch all your polishes? How do you store your swatches?  If you don't swatch, how do you organise and keep track of your collection?

Monday, 21 May 2012

No7 Poppy King Lip Crayon - Raindrops Collection (Smiling & Skipping)

As suspected, the lure of a 3 for 2 and the No7 £5 off voucher was too much, I had to go back for the other 2 Crayons in the Raindrops collection.  You can see my first post on them here.


This time I picked up Smiling and Skipping; a bright, blue based red and a very sheer berry colour. Skipping is definitely the least pigmented from the collection and leaves just a hint of subtle colour on the lips whereas Smiling is as punchy and bright as the previous 3 I've tried.

Not much more to say on these other than to echo what I said in my last post about them.  I really like the texture and wear of the Crayons and after having tried them out some more over the weekend I am really pleased with them, they're very wearable colours, look great on the lips and last surprisingly well for this sort of product.

Finally, here are a couple of swatches of my two newest editions:


Monday, 26 March 2012

Revlon Lip Butters - Part 2

After trying out some of these last week I was rather hooked. so when Boots started their 3 for 2 promotion on cosmetics I decided I would grab the other ones I fancied trying while they were a bargain, any excuse!

The three I chose were Strawberry Shortcake, Creme Brulee & Sweet Tart:


Strawberry Shortcake is a lovely bright, Barbie-esq sheer pink, creme Brulee is a beigey nude and Sweet Tart is an almost neon leaning pink, but also nice and sheer so not too in your face unless you apply several coats.


Swatches of the three new additions colours on my hand.


I'm now going to try and stop myself from buying he rest of the range as I really do love these but surely 7 of my favourite colours are enough for anyone!? For now at least.

Friday, 9 March 2012

Barry M Lilac Foil stamping

Another quick lot of stamping to try and cover up tip wear and make my polish last another day, unfortunately it didn't work out too well, the tip wear is still visible and a couple of fingers are a bit smudged but I do like the pattern, definitely one I'll use again.


Wednesday, 7 March 2012

Barry M Indigo & Sally Hansen DVD

Two coats of Barry M Indigo and then 1 of Sally Hansen HD Hi-Definition Nail Color in DVD.

In person it's a gorgeous shifting duo-chrome which moves through light blue, lilac and into a deep Cadbury's purple but unfortunately in my photos it is not. It's still quite pretty though.


And here is my attempt to get another day out of the Barry M mint from the weekend:

Tuesday, 6 March 2012

Trying again (& Barry M Mint Green)

So, a year later I have decided I might try and keep track of my nails on this blog, again. Let's see if it works any better this time around!

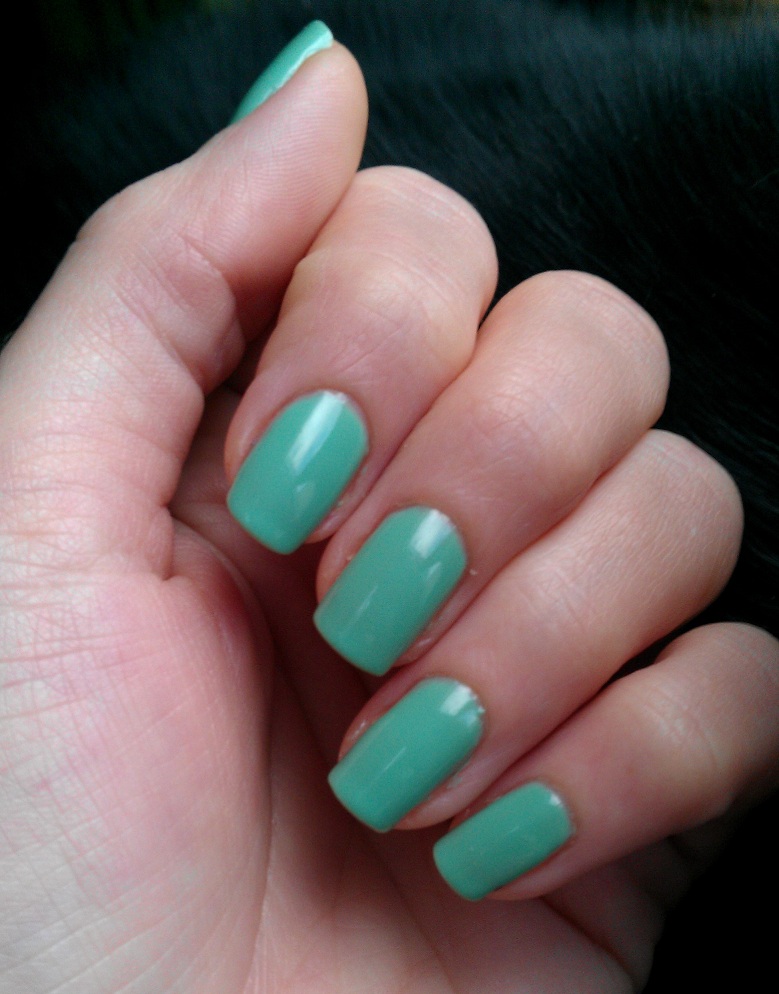
Saturday night's nails in Barry M Mint Green, to match my new shoes!


Using my swatch sticks to choose the best shade:

Tuesday, 4 May 2010

MUA (make up academy) @ Superdrug

The new £1 range of make up at Superdrug, MUA (make up academy) looks, on first inspection, like it could have some potential. The packaging is basic but alright looking, it feels sturdy enough and the products are a good size. None of it looks really cheap, which it is, so a good start.

What immediately drew my attention were the eye shadows, they’re bright, bold colours available in 20 shades, 16 pearl and 4 matt. Over two trips I have managed to collect almost the whole set and I was super impressed with them they are phenomenal! All lovely colours and they go on so well, they are bright, last all day and they blend amazingly well. Also, several of the colours are exactly the same as other, more expensive shades from the bigger brands. So far there is an exact dupe of MAC’s blue brown (shade 12) and Kitschmas (the light lilac pearl )pigment and one which is very similar to a Barry M dazzle dust too (dark bluey purple shot through with pink).


I’m really taken aback by the quality of the eye shadows, they feel fantastic to use and look as good, if not better, than a lot of far more expensive products I own. I’m forever picking up cheapy make up bargains and regretting it later when they just don’t give value for money but the MUA range is definitely not like that at all. The matt colours aren’t quite so bright and vivid as the pearl shades but they still look good and apply well.


I also bought one of the blushes, very highly pigmented, goes on nicely and last really well, so another recommendation there.

However, I tried both the lip gloss products too, the squeezy tube and the wand applicator one and they are both rubbish, they taste weird and are thin and greasy and seem to slip off your lips into your mouth and they make me gag they taste so foul, I threw them both in the bin the day I bought them. So no rave review for them unfortunately.


Overall, I’m amazed at the quality of the eyeshadow, especially given the price and look forward to seeing if Superdrug decide to extend the range of colours, judging by the empty display when I went back in to have another look they won’t have any problem with excess stock in the near future. Go try some!

Eyeliner Swatches - UD vs MAC

Some colour comparisons of the new Pearlglide liners from the MAC Art Supplies collection and Urban Decay’s 24/7 liners.


In my opinion:

Black Line is VERY similar to Stash, it's maybe a tiny touch darker but not so you'd really notice. It may be more obvious on the eye but swatched on the back of my hand it was hard to tell the difference.

Undercurrent is very like Covet, it's a slightly deeper, richer shade and it does have more, but also more subtle, shimmer through it. Too similar to justify a purchase if you already have Covet like I do.

Industrial is totally different from anything UD make, it's a lighter, sparkly more lilac silver blue than an of the other eyeliners I've tried. It definitely take on obvious lilac tones when used with purple eyeshadows but looks more blue when matched with blue shades.

Petrol Blue is much richer and darker than Binge, it's what I hoped binge would be like.

Almost Noir is very similar to 1999, it's slightly darker but not much and there is a more intense quality to the glitter in it, but overall it's too similar to warrant a purchase for me.

Designer Purple is, again, a deeper, richer more glitter filled pencil but it is quite similar to the UD colours I already own. I suspect layering Lust or Ransom over Rockstar would give a very similar effect.

All in all there are really only 2 of the MAC pencils I felt I could justify buying, I would have loved to have all 6 but the other 4 colours felt too much like buying double of what I already own.

For those who don't own the UD dupes / versions of the colours then I would highly recommend the MAC pencils, the colours are really fantastic, bright and very shimmery due to being packed with lots of very fine glitter.

I'll definitely be keeping an eye out for more Pearlglide liners in the future, let's just hope MAC can come up with more colours that aren't already available (and in my collection).

MAC Art Supplies - Pearlglide Intense Eyeliner

MAC’s Art Supplies collection launched at the beginning of April in the UK, I have been very good recently and not really looked into the new collections at all, mainly because I get hideously sucked into the hype and end up feeling like I won’t be complete until I buy it all, so it’s easiest all round if I just stay clear of MAC. This collection was different though, mainly because I saw a review on You Tube of the lip products and decided I had to try them (more on them later). While I was in it would have been rude not to try out the eyeliners, here’s what MAC says:

“Paint it, scribble all over, Art Supplies is everything you need to paint the ultimate self-portrait: Different styles of art pencils create eye looks that are expressive and individual, for a new kind of PowerPoint presentation. The pencil portion of the collection focuses on a Greasepaint Stick in eight fabulous, limitedlife shades… the ultimate inky colour payoff is an homage to the success we had with Style Black and DSquared² last season. Use as a Shadow or Liner: ludicrously long-wearing, transfer – and water-resistant, flexible and five-star comfortable. New Pearlglide Intense Eye Liner with an exciting new shimmering sparkle effect, will also launch in limited-life, featuring six slick, smooth, sextronic shades.”

I tried the Greasepaint sticks and wasn’t too fussed, the colours are all too dark for me and I don’t think I’d get much use out of them, the Pearlglide liners however. :swoon:

I ended up with 2, as I was trying to be good.

* Industrial – A gorgeous blue, grey which takes on iridescent lilac tones in certain lights
* Petrol – Deep dark navy blue with a hint of shimmer


Industrial is like nothing I have tried before and absolutely gorgeous, it’s very versatile and changes colour depending on what you wear it with. I love it! Petrol is what I hope Binge from Urban Decay would be like, a erally dark, proper navy, again I adore it.

I also adored:

* Designer Purple – Dark shimmery violet/purple
* Undercurrent – Blue, green, teal, peacock shimmer

I am still torn over Designer Purple, I love purple on my eyes and it was a gorgeous colour but very similar to a couple of UD liners I have so silly to double up, Undercurrent is the same slightly different from UD’s Covet but not enough to justify the money. The other two Almost Noir and Blackline, cn be duped exactly with UD liners I already have, so silly to buy them. More on the colour comparisons later.

The pencils go on beautifully, really glide on, as the name suggests and the colour lasts brilliantly all day. They remind me a lot of the UD 24/7 pencils which is no bad thing in my book and unfortunately means I may have to check out future collections if they release nice colours that I don’t already have. They are very soft but I don’t find that an issue as I am careful when I sharpen and don’t use pencils if I want an exactly defined perfect line.

As I mentioned, the colours can be duped using Urban Decay pencils so I have done some comparison swatches to show that but I’ll put them in a separate post to keep it neat.

All in all, I really rate the Pearlgide liners and I almost wish the colours were slightly different so I could have more!

Tuesday, 20 April 2010

Nail Varnish

I used to be very into my nail varnish, but laziness and having short stumpy nails for climbing has put me off in recent years. However, of late, I decided I didn't have enough stuff to spend my hard earned cash on and have become a big fan again.

So hopefully, from now on, I will have lots of lovely nail swatches to add too, for now here are some recent shades:


Tuesday, 3 November 2009

Urban Decay 24/7 Glide-On Eye Pencil Swatches

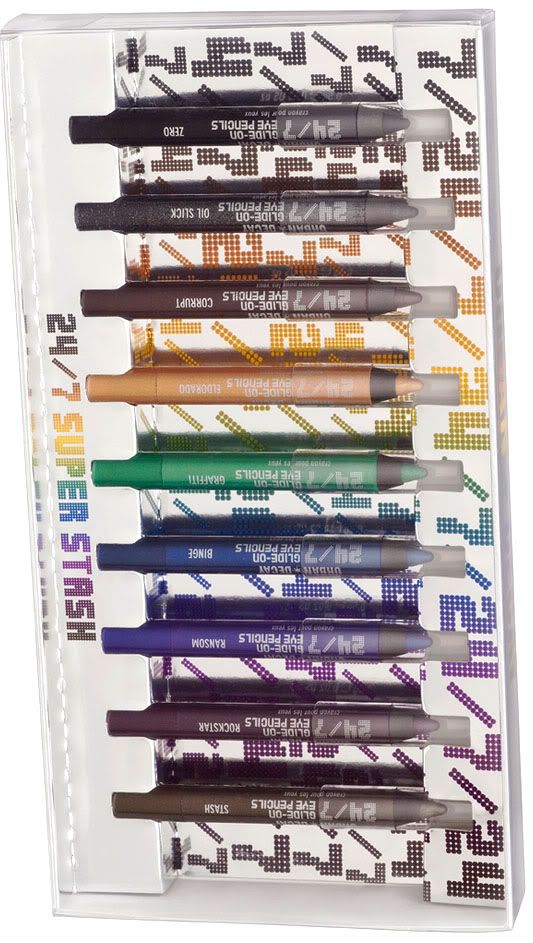
Eventually! I am the proud owner of the new Super Stash set from Urban Decay:


I was slightly concerned that a lot of the newer colours were doubling up on the existing ones in the line so I have done some comparison swatches. The names are on the photos and should show up better if you open them in a new window.

Ransom & Lust.
Ransom actually seems brighter and more vivid than Lust which shocked me, I was expecting it to be a bit darker and less vivid, definitely a different shade though which is good:


Underground, Bourbon, Corrupt & Oil Slick.
Underground is darker than I expected, which I am pleased about, though lighter than Bourbon. Corrupt is a good bit darker than Bourbon. Oil Slick is black but with quite a bit of glitter in:


Binge, Deviant, Covet, Flipside & Electric.
Binge is navy, although not dark, dark navy, it's darker and less vivid than Deviant. Covet is a lot more teal than the others and darker. Flipside is turquoise, and quite a light, matt shade. Electric is the lightest of all:


If you'd like to see side by side comparisons of two colours other than these ones, let me know!